Adding your own textures to a model
A personal touch...
Table of contents
IntroductionAdding the texture to the DeleD Texture folders
Converting the texture to a material
Applying the material to your scene
Conclusion
Introduction
So you are done playing around with the default materials DeleD offers. You have found this really cool texture on the internet (or created one of your own), and now you want to know how to use it!This tutorial will elaborately explain the three-step process that is involved. First, you'll need to know where to put your texture. Then we'll show you how to convert it to a DeleD material. And last but not least, how to actually apply it to your model.
Adding the texture to the DeleD Texture folders
First thing we'll need is a texture. This needs to be a file in a format that DeleD supports. Currently that means a .BMP, .JPG, or (if you are running PRO) a .TGA image. I'll be using the eyeball.jpg image as shown below. Notice the faint reflection of the CastleSiege scene... ok, so let's hope you got your hands on a better texture.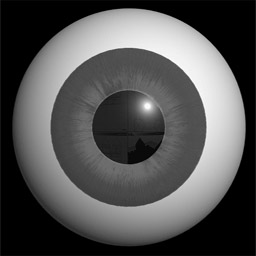
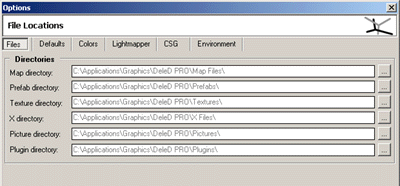
The DeleD textures are all neatly stored inside a single texture folder. The location of this texture folder, depending on your installation, would be something like C:\Program Files\DeleD Pro\Textures. To find out the exact location, open up the Options (CTRL + ALT + O), and click on the Files tab. The Texture Directory will tell you were to find your textures. Notice how my folders are in a non-standard location.
Now start up the Windows Explorer, and navigate to this folder. As you can see the texture folder is divided in (in my case a lot of) subfolders. Those subfolders are the texture categories that will show up in the material editor. More and that later, all you need to know now is that you'll need to place your texture inside on of these categories. I'll create a dedicated subfolder for my eyeball called FreakShow, and copy the eyeball.jpg image into it:
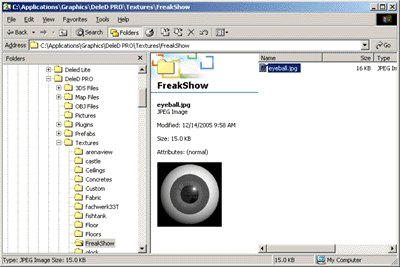
Note: The Material Editor will only display textures that are in a direct subfolder of the Texture Folder, so make sure not to put the textures inside the Texture Folder root!
Converting the texture to a material
Open up DeleD, and start the Material Editor by clicking it in the toolbar:
The Material Editor will pop up. The Material Editor is one of the most important tools within DeleD, so make sure you get a good grasp of the functionality it provides!
- On the left are the layers of the currently selected material. Unused layers are disabled.
- On the top right are the materials stored within the current scene, divided in different categories. These are the same materials you see on the left hand side during normal editing, in the Material Picker.
- On the bottom right are the textures available in the texture folders. Note how the categories match the subfolders of the Texture Folder we saw before.
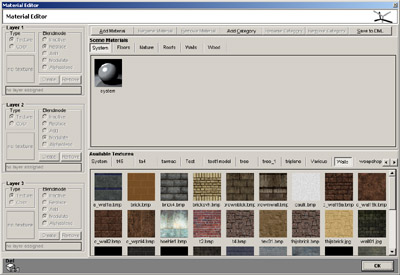
What we want to do is add the eyeball texture to the available materials within the scene. However, before we get to that, let's first create a category for it. Click the Add Category button, or simply hit ALT + C. A dialog box will pop up, asking you for a name for this new category. Let's call it something like "Misc", and hit OK.
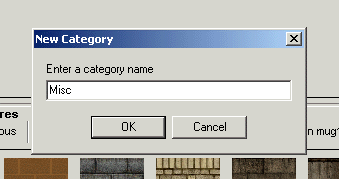
The new, empty category will be selected at the top right of the screen. Now from the available textures (bottom right) select the FreakShow category. You will see the eyeball.jpg texture we previously copied there. The quickest way to create the new material is to simply drag the image from the available textures into the scene materials:
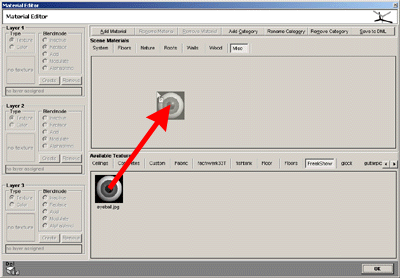
This will instantaneously create a single-layer material called "eyeball". You could now close the Material Editor and start using the new material.
There is also a more controlled but elaborate way to create a new material:
- In the toolbar, click Add Material (or hit ALT + A). A new material will be added, with the default system texture and a generated name.
- Select the material by clicking it.
- Click on the Rename Material (ALT + N) button to give the material a more appropriate name.
- Now drag the texture onto the first layer to assign it.
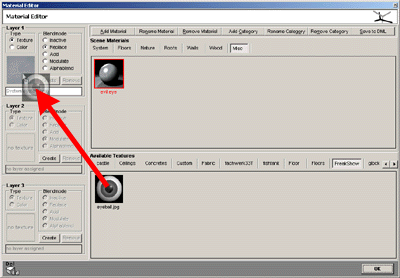
This is a lot more work if you just want to create a simple material fast, but if you want to modify existing materials, or create multiple layers, knowing how to assign textures to a layer by dragging is essential.
Applying the material to your scene
Select the object you want to apply the material to. If needed, go into face mode (by pressing F) and select the appropriate faces.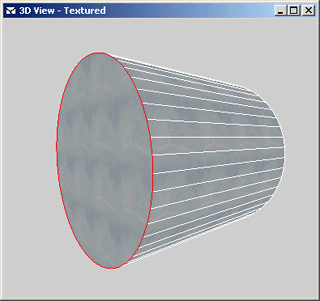
Now use the Material Picker (on the left hand side of the screen) to browse to the new "Misc" category we previously created, and select the eyeball material by clicking it.
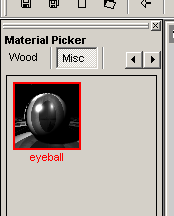
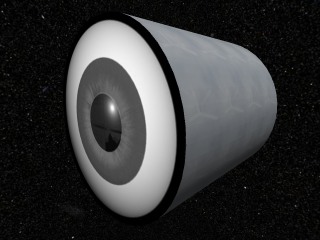
The material will now be assigned to the selected faces. Adjust the UV coordinates the way you see fit (I'll use CTRL + SHIFT + F to fit the texture to the face), and we're done. Look, it's the fearsome canned-eyeball-from-outer-space (let's not discuss my modeling skills here)!
Hint: If you work with detailed textures, it might be more convenient to change the material preview image from the shiny ball to a straightforward view of the material. To do so, open up the Options screen (CTRL + ALT + O) and click on the preview image below Material Preview Options.