Introduction to UV Mapping
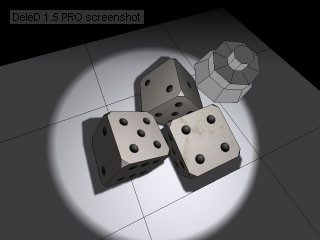
Texture mapping a die
Table of contents
IntroductionModelling
Mapping
Creating and assigning the texture
Conclusion
Introduction
By default, DeleD applies a repeating (planar) texturing scheme onto all primitives you create. This works fine when creating worlds, but when you are modelling a single detailed object you usually want a bit more control over the texturing.This is where UV Mapping comes in. An "UV Map" is a 2D map representing the texture coordinates on a 3D model. Using such a map, you can then paint a detailed texture in your painting application of choice, and have it wrap around the 3D object correctly. In this tutorial we'll take you through some of the basic concepts involved.
Modelling
From the primitive tree, select the Cube primitive. Drag a rectangle in any of the 2D views to create a cube. Select the cube by shift-clicking it in any of the views.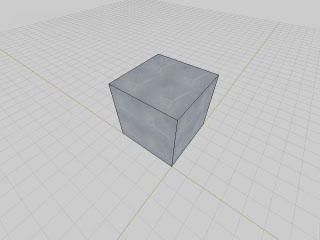
Make sure snapping is off (F8). Now go into Vertice mode (V), and select all vertices of the cube (CTRL-A). From the Low Polygon Editing pane, select the Bevel command. Slowly drag the mouse from right to left in the top view to give the corners of the die a nice beveled look.
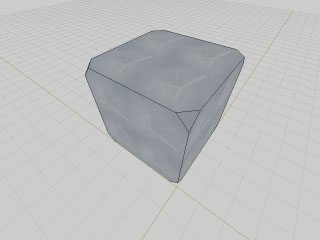
Our (very) basic model is now finished. This would be a good time to save it.
Mapping
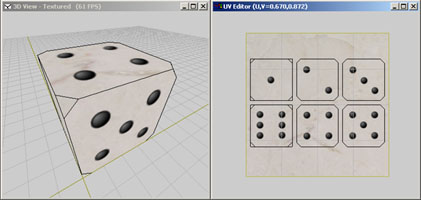
The first thing you'll want to do is setup a nice viewport layout to work in. Pick a viewport next to the 3D perspective view, right-click it to bring up the context menu, and select Change View Into..., UV Editor. Having the perspective view next to the UV Editor allows you to immediately see any changes you make to the UV Map reflected in the 3D world. You'll end up with a layout similar to the one below.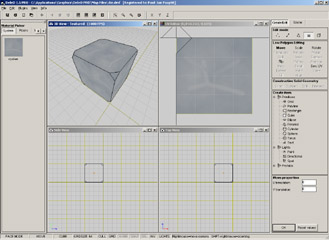
Use the scrollwheel on your mouse to zoom out until you can see all of the UV Map. The texture and grid in the middle of the view mark the (0, 1) range. As you can see, the planar mapping scheme generated uv coordinates that are much larger, causing the texture to repeat. As stated in the introduction, that is perfectly ok if you are editing a world, but if you are texturing a single object you'll want all coordinates to be within that grid.
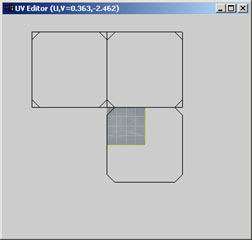
Use the scrollwheel to zoom back in, or select Zoom Level, Fit to window from the context menu. As a quick start to the mapping process, now select Generate UV, Box Mapping from the context menu.
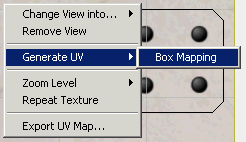
Note: Box Mapping is a very specific type of UV Mapping, that projects the texture from the six sides of a box at your object. It is particularly useful for any object that is (more or less) box-shaped, but the textures of any faces that are not aligned with one of the basic planes will get deformed.
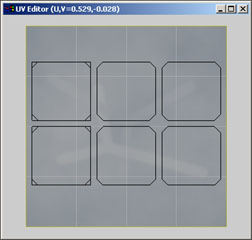
If you feel like it, you can now go into face mode (F), select some of the faces and move/scale/rotate them around a little bit, to get a feeling for the way the UV Editor works. When you are satisfied with the layout of your UV Map, once again click the view with the right mouse button to bring up the context menu, and select Export UV Map....
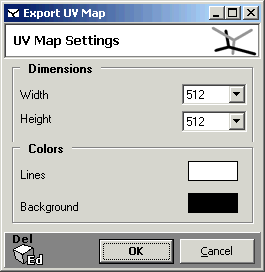
This dialog allows you to choose the (power of 2) dimensions for your map. I choose 512x512 for this example, but it really isn't that important. You'll be using the UV Map as a basis for your texture, but there is no reason why you should save the final texture with the same dimensions as the map. It's all up to you.
If you want to, you can change the colors of the map as well, but as we'll be painting over it anyway, I'll leave things the way they are. Now press OK, and save the UV Map anywhere you like. You might want to drop it directly into DeleD's texture folders, but personally I like to keep any textures that are 'under development' in a separate place.
Creating and assigning the texture
Fire up your favourite 2D paint program, and load the UV Map you just saved. It will look something like this: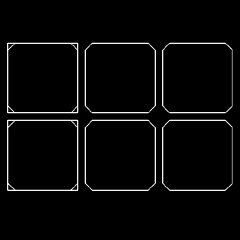
Now it's time to get artistic and start drawing the texture. A paint program that offers layer support can be very convenient here, as it enables you to draw under the lines from the map, in stead of immediately overpainting them.
Note: When painting, make sure not to stay between the lines, but generously overpaint them, adding some extra pixels to each side. Because of things like texture filtering and mipmapping, the rendering application might render any pixel as an average of all nearby pixels. By adding a few pixels to all sides you make sure this doesn't cause any visible artifcats.
I ended up being a bit lazy, and filling all of the background with some freeware marble texture. I then generously sprinkled black dots here and there, without worrying too much about things like alignment. You'll find my final texture below. You should be able to do a much better job...
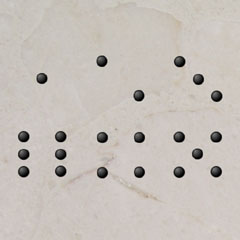
When you are done painting your texture, save it into one of DeleD's texture folders. If you are not exactly sure about this process, please refer to our tutorial on adding your own textures.
Now it's back to DeleD. Open up the Material Editor, load the texture you just created into a new material. Close the Material Editor, select the die, and assign your new material by selecting it in the Material Picker. And voila, there it is: your have succesfully UV Mapped and textured your model!
Conclusion
Of course, there is far more to UV Mapping then what has been discussed in this tutorial. As you start texturing more and more complex models, you'll soon find a simple Box Mapping doesn't cut it. You'll start to feel the need for more advanced mapping and unwrapping methods, but above all you'll need to master the skill of efficiently laying out UV's using the UV editor. From here, it's all up to you. Roll the dice!