Constructive Solid Geometry
Table of contents
IntroductionGetting Started
Union
Subtract [PRO only]
Intersect [PRO only]
Split [PRO only]
Optimising Your Objects
Conclusion
Introduction
Constructive Solid Geometry, or CSG, is a really nifty feature in DeleD that can really save you time when creating a scene. CSG operations calculate which parts of two or more objects are intersecting, and create a resultant object in various different ways. CSG enables you to create, for example, doors or windows in walls in a really quick way and is as such particularly handy for levelediting.Getting Started
The CSG buttons are located on the right-hand panel, inbetween the low polygon editing tools and items menu. If you are using DeleD LITE then everything except 'Union' will be greyed-out. Only PRO users have access to all four CSG functions.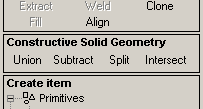
Union
To demonstrate the union function let's create a cube and a cylinder. Drag out the objects and position them as shown below, (left) then select them both (by holding Shift-Ctrl) and click the 'Union' button. The result is one object created by uniting the cube and cylinder (right).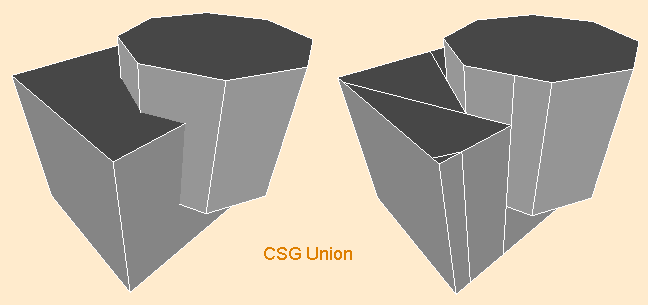
See how a vertex is created at every point that an edge from one object intersects a face from the other object. Each new vertex is joined by an edge to an extra vertex in that face. These vertices are a byproduct of the CSG operations resulting in unnecessary polygons. You can read how to optimise your objects in the Optimising Your Objects section.
The union function is different from all the other functions, in
that it doesn't really change the shape of your geometry (unless
you have unseen detail where the objects intersect), it just merges
the two objects into one object. For this reason union should be
used with consideration as it can create extra polygons (even when
optimised) that could be saved by leaving the objects separate.
However, uniting two objects removes overlapping polygons and can
prevent artifacts happening when rendering objects at distance.
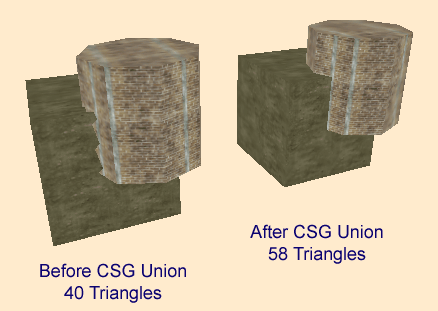
The image below compares the pre-CSG scene to the post-CSG,
polygon-optimised scene.
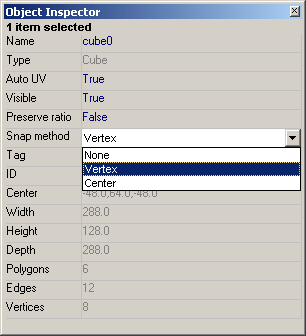
Due to the extra vertices created, vertex-snap is turned off on
objects after CSG has been performed on them. Often you may wish
to turn vertex-snap back on again; to do so simply right click on
a window while the object is selected and click 'Properties', or
click on 'Object Inspector' in the 'View' menu. The snap mode
can be changed via a drop down menu.
One last thing to note is that the CSG union operation can be used
on any number of objects at a time. The only thing to be careful
of is that each object adds more and more unnecessary polygons to
the calculations, so the time taken to perform the operation will
increase exponentially with object numbers. This will also mean
the resulting object will be a lot harder to
optimise. A better idea for large
numbers of objects is to merge two objects at a time, and
optimise between unions.
Subtract [PRO only]
Subtract is probably the most useful CSG function of the four. It allows you to carve bits out of objects, allowing you to create things like windows, doorways and hollow buildings with ease. Let's use the cube and cylinder example from before. Set up the scene as shown below (left), but this time before clicking 'Subtract', make sure you select the cube first and the cylinder second. The first object has the CSG operation performed on it, and the second object is the 'operator'. Try it out: use both objects as the operator and see what kind of results you get.
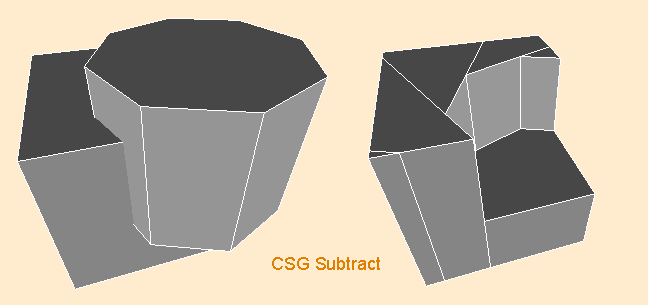
The operator defines the shape to be carved out of the other object.
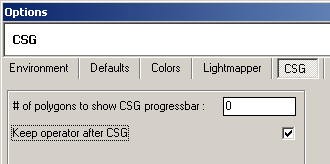
In the above picture you can see the cylinder operator has carved a
cylinder shape out of the cube. You can also select whether you want
the operator to be deleted after the operation in the options,
accessable via the 'View' menu, or by pressing Ctrl-Alt-O. Then click
on the CSG tab. The other option in the menu allows you to choose
how many polygons need to be involved in a CSG operation for the
progress bar to show.
As with union, any number of objects may be used in subtraction, but
only the last selected one will be used as an operator. Subtraction
with more than two objects is like performing multiple, separate CSG
subtractions using the same operator. Handy if you want to take a
chunk out of a scene made of more than one object.
Intersect [PRO only]
Intersect, as the name suggests, leaves only parts of the objects that are intersecting each other. Using the same example again, you can see below that what is left is a kind of half-cube, half- cylinder. Intersect is handy for making these types of objects, and what is really good it that there are no unnecessary polygons generated, so no optimisation is required.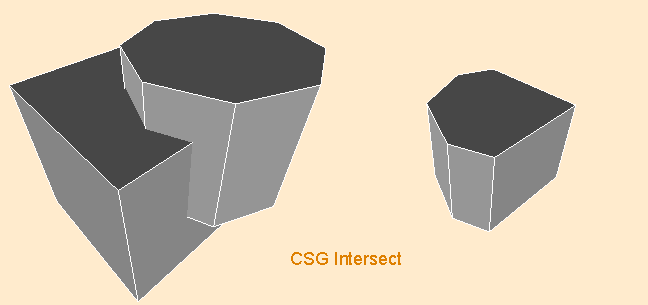
Intersect, like union, doesn't use an operator, and any amount of objects can be used in the operation. Just note that with more than two objects, only where ALL of the objects are intersecting will new geometry be generated, not just where two objects intersect.
Split [PRO only]
Split isn't really a separate CSG operation, but a combination of subtract and intersect. You can imagine the operation as 'cutting' your object in half. As with subtract, an operator is required, so the first object selected is the one to be cut, and the second is the 'knife' as such. You can imagine the polygons in the operator as thin blades that slice chunks off of the object.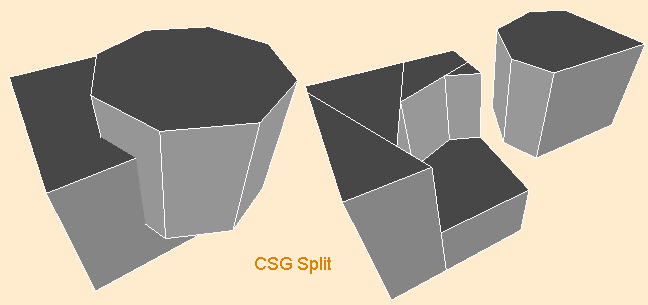
In the image above I have moved the 'cut-off' object to the side to make it more clear what is going on. Two objects are generated; the 'cut-off' you can see is identical to the result of the intersect operation, and the other part is identical to the result of the subtraction operation. The split operation only allows two objects at a time to be used, and an error message will appear if you attempt to use more than two.
Optimising Your Objects
As mentioned before, some of the CSG operations, namely subtract and union (and the 'subtracted' part of split) generate extra vertices that result in extra polygons. Taking the usual example, uniting the cube and cylinder creates a total of 76 triangles, but by optimising this can be lowered to 58 triangles. It is especially important to optimise when performing multiple CSG operations on objects, as these excess polygons can build up quickly.
Step 1: Merge Adjacent Polygons
The first stage in optimising is to merge adjacent, parallel polygons. For example, the image below shows merging of the polygons on top of the cube face.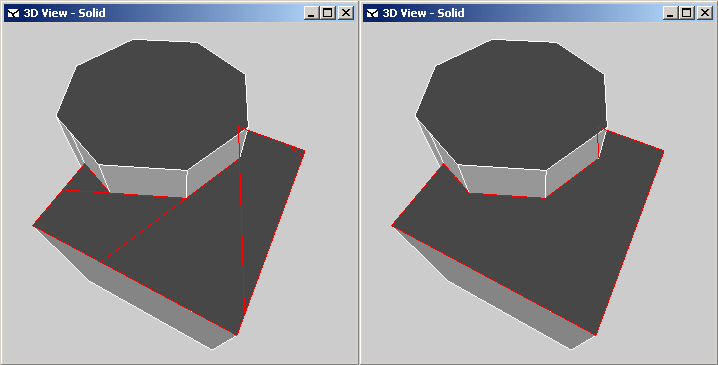
To merge polygons, simply enter polygon mode, select all the adjacent polygons you want to merge, then click the 'Merge' button located on the menu. This will delete the edges separating each polygon, creating one big polygon. Continue merging to remove the remaining excess polygons.
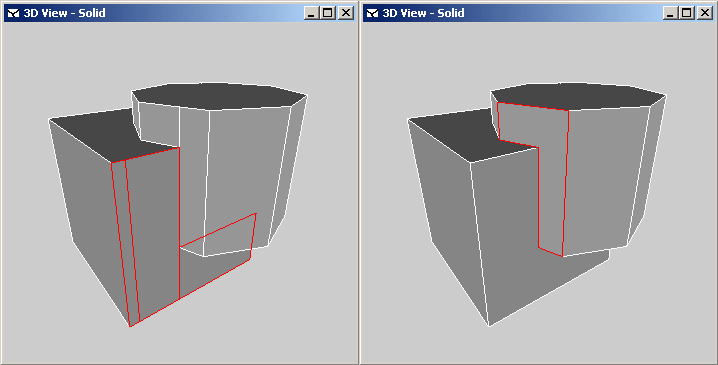
Step 2: Delete Isolated Vertices
The next stage in the optimisation is to delete all isolated vertices. Isolated vertices are vertices that only join two parallel edges, and should be removed otherwise the polygons we just removed will re-appear during triangulation. Enter vertex mode, select all of the isolated vertices, and hit 'Delete' on the keyboard. Job done.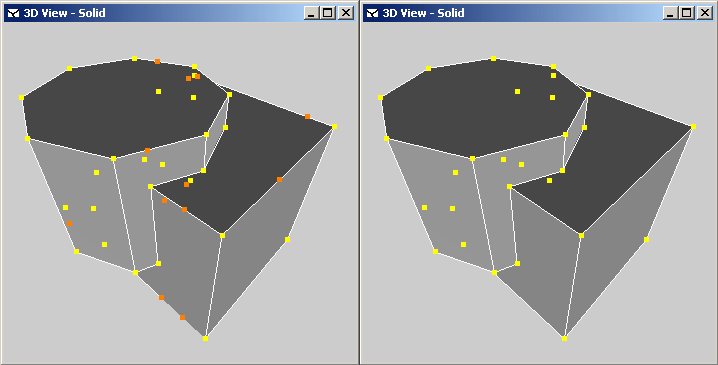
Step 3: Fix Concave Polygons
Note that some concave shapes of polygon render oddly, so you may have to join some vertices to separate the polygon into a set of convex polygons. Below on the left you can see a concave polygon rendering wrongly, and on the right I have joined the vertices (using the Vertex Connect function) to fix the problem. This results in a set of convex polygons. This stage is not always necessary. Alternatively, you can use Triangulation to create convex polygons also.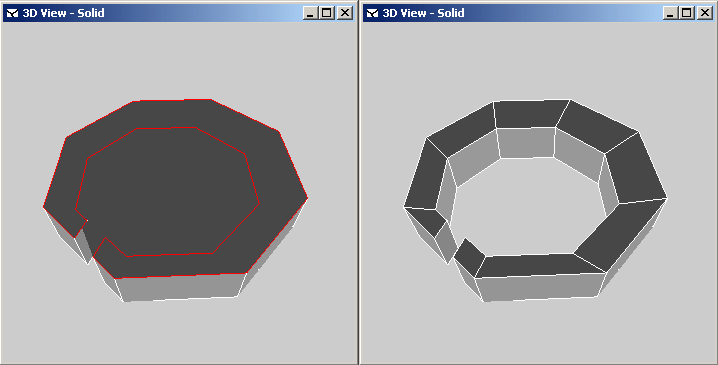
Conclusion
This is pretty much all you need to know about CSG, now all you have to do is go and experiment. With experience you'll learn when is the best time to use CSG and when isn't; that kind of experience is not really something you can sum up in a tutorial.
To end this tutorial, here's an image of the kind of thing that is possible
using a combination of all the CSG functions. Have fun with CSG!
