Using Torque Runway Lights
Table of contents
IntroductionCreating the scene
Lighting the scene
Conclusion
Introduction
This tutorial is part of an upcoming series of small tutorials highlighting specific parts of the DeleD to Torque art pipeline using the Torque Exporter.In this tutorial, we will discuss a Torque entity called 'light_runway'. To follow the steps, you'll need a copy of DeleD (either LITE or PRO) and the Torque Exporter. Because I am keeping this sample scene very simple, the free demo version of the exporter will be enough. For any real-sized scene, you'll probably want to get the full version, as the demo is limited to 25 brushes total.
Creating the scene
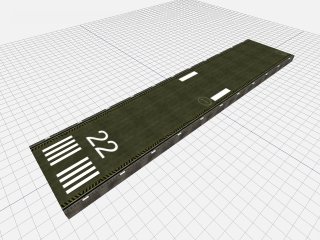
While runway lights are great for things like spooky claustrophobic alien corridors, today I'll be using them for the obvious purpose of... modeling a runway.I quickly slapped two cubes together, textured them with some concrete-like texture, and fit a home-made runway texture to the top faces (using CTRL-F to fit the texture to the face). There is no particular reason to use two cubes instead of simply one, but I just found the editing of a very wide texture to be a bit cumbersome, so I decided to go with two separate 1024x512 ones.
Lighting the scene
As is explained in the Entity Reference inside the Torque Exporter help file, the Torque light_runway entity is a light that runs in multiple steps from the light origin to a target. Because we'll want the runway lights to run at both edges of the runway, let's add two lights two the start of the runway, and two targets to the end. As targets I'll be using ordinary cubes, naming them "endOfRunway1" and "endOfRunway2" using the Object Inspector. The actual geometry of the target will be ignored anyway, so you can use any shape you want. Just make sure it's something you can easily recognize.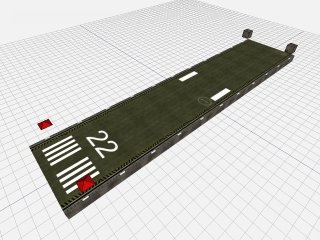
For the lights, you can use any primitive you want, but I'll be using point lights because they provide ready-to-use color and range characteristics. The diffuse color will map onto the color of the Torque Light, while the range maps onto the falloff2 property. Select any of the lights and open up the Object Inspector.

We'll leave the color of both lights white, although I slightly lowered the brightness of one of them, because in my experience Torque will ignore one of the runway lights if their characteristics are exactly equal. I'll set the range a mere 160 to avoid having the runway lights brighten all of the runway. Once we have those properties set, it's time to get the intesting part: the custom properties. In the Object Inspector, select the Tag field, and hit the little (...) at the end to pop up the Custom Properties editor (only available in DeleD 1.71 and above, in older versions you'll have to directly edit the contents of the Tag).
Here you can edit any property that is not readily available in DeleD. For an overview of the available for a light_runway entity, see the Entity Reference inside the Torque Exporter help. Most importantly, we'll need to set the classname, to mark our pointlight as a light_runway entity. We'll also need to provide the name of the target. As I named the target primitives (the two cubes I added to the end of the runway) "endOfRunWay1" and "endOfRunWay2", that's what we'll need to fill in here.
Next up is the number of steps we want the light to take between the start point and the target. In my texture, there is a total of 11 lights (including start and end), so that implies a value of 9 for the steps property.
We'll set the speed to "3", which means the runway lights will move along the edge at a slightly faster speed than normal. You can play around with this value to see what speed you like best (valid values are in the 0-4 range).
Repeat the above for the other light, making sure to point to the other target primitive as well. That's about it for the two lights. Now all that is left is telling the exporter that the two target cubes we placed into the scene are actual targets, and no ordinary geometry. Select the two cubes, open up the Custom Properties editor again, set their classname to target, and our work is done.
Now open up Torque, start the World Editor, and use the World Editor Creator mode to select the .dif you just created from the tree (inside data->interiors) and place it anywhere in the world. To get the maximum effect from the animated lights, you might want to change your scene into a night-time setting (I simply lowered the sun to an elevation of zero). If everything went well, your scene would now look something like this:
It might not look much from this poorly animated screenshot (only half the frames are included, and I lack artistic talent in general), but seen in real time we have some really nice lights running along the edges of our runway. And it even has a superspeed stealth aircraft approaching (ok, so that's really just the mousecursor I forgot to exclude from the screenshots).
Conclusion
You now know how to use the light_runway entity... I hope it will inspire you to light up many a runway, landing strip, helipad, spaceship lining, electrical conduit and whatnot!
A zip file including the DeleD scene (.dxs) and any non-standard textures used is available here. If you didn't move the DeleD subfolders around, you can simply unzip it right into your DeleD application folder.